USB-QC30R2 programming cable driver installation instructions
Overview
The USB programming cable communicates with the Q-series PLC via the USB-QC30R2 programming cable by emulating the computer’s USB port into a traditional serial port (usually COM3).
Features
● Supported operating systems Windows XP/ Windows2000
● Compatible with USB V1.1 V2.0
● Baud rate: 300bps ~ 1Mbps automatic adaptation
● Only one USB programming cable is supported per PC
System Requirements
Please make sure your computer is IBM PC compatible and has the following minimum system requirements before using the USB programming cable:
● Intel compatible with 586DX4-100MHz CPU or higher
● A standard USB interface (4-pin A-type socket)
Driver installation
The installation of the driver is very simple, just follow the prompts. Take Windows XP as an example, follow these steps:
1. Open the computer and insert the driver CD.
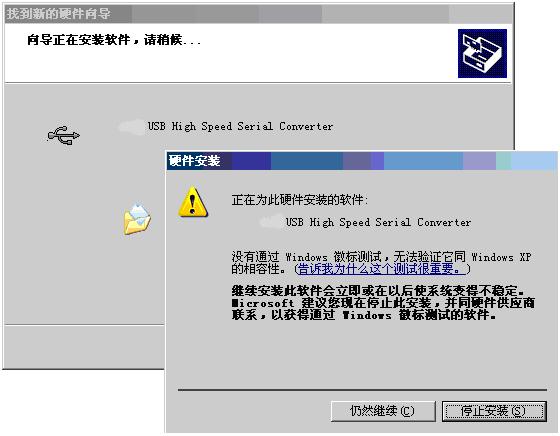
2. Plug the USB-QC30R2 cable into the computer’s USB port. Windows will detect the device and run the Add New Hardware Wizard to help you set up the new device and click Next to continue.
If Windows does not prompt for new hardware, in the Device Manager’s Hardware list, expand Universal Serial Bus Controller, select the USB device with the question mark, right-click and run the update driver.
3, Windows will detect the installation information, and the following does not pass the USB-QC30R2 driver installation instructions _ library download https://www.wenkuxiazai.com/doc/1ad4d6a8aaea998fcc220e97.html Windows logo test information box, click “still continue “.
4. Continue the installation and let Windows copy the driver files to your hard drive.
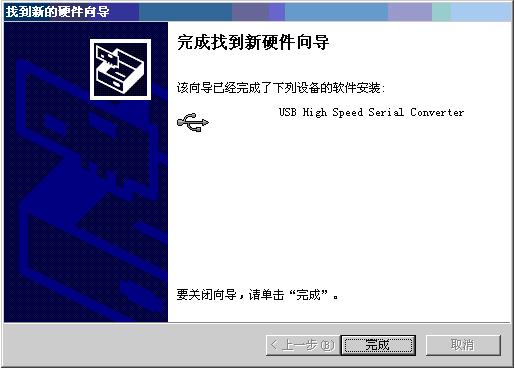
5. When Windows displays the Found New Hardware Wizard, click Finish to complete the installation.
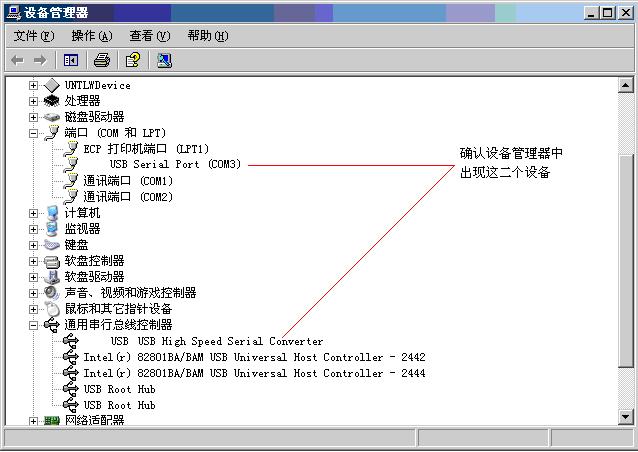
6. After the installation is complete, please confirm that “Prolific USB-to-Serial Comm” appears in the “Port\(COM and LPT)”\Expand entry in the “Start\Control Panel\System\Hardware\Device Manager” menu of Windows. COMx)”, this COMx is the COM port number used by the USB programming cable. The port number is related to the computer. It is usually COM3 or COM4. The COM port will appear when you insert the programming cable every time you use it. You only need to use the programming software or The COM port number can be selected by selecting the application software such as communication software.
Driver removal
The driver is deleted to release the COM port resources for use by other devices, or to remove the driver and then reinstall it. Follow the steps below to remove the driver:
1. Unplug the USB programming cable from your computer.
2. Run the DRemover98_2k.exe program under the driver CD.
3. Display the prompt window and click the “OK” button.